I used to think that making bread was something that only professional bread-makers could do. It wasn’t until I decided one day to attempt making my own bread (because I was sick of shop bought bread plastic packaging with lots of preservatives), that I discovered it didn’t take a genius to make a half decent loaf!
Now, I have probably made over 50 loaves of bread and counting over 8 years since 2018 when I first started. As of 2026 I now exclusively eat homemade bread and will not go back. It is cheaper than shop-bought, mostly organic, healthier and I find making bread with a food processor so therapeutic, especially since I got a wrist injury (not bread making related).
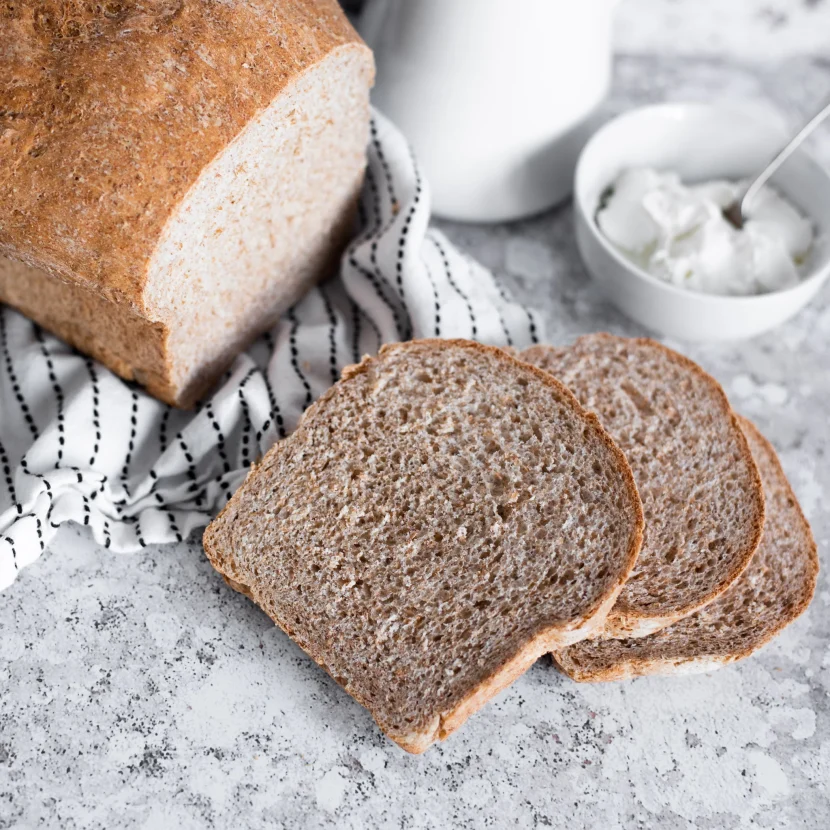
I have managed to achieve consistent quality of my homemade loaves. I wanted to share with you the recipe and techniques I use to make a perfect homemade 70/30 bread.
To prevent waste, I keep my sliced bread in the freezer and just use the ‘defrost’ setting on my toaster to make them like new again if I want to make a sandwich or toast, or put them in the microwave for 30-40 seconds.
Since making my own bread, I have not had ANY bread food waste. I think it really does help to keep bread in the freezer (even shop bought bread) to prevent food waste. There is so much food waste (approx. 1/3 of all food bought is wasted, when it could be put to good use), so making use of your freezer will help you to waste less food and save money in the process (more food in tummies, less in the bin = less shopping trips to buy more food). I have 2 freezers, because it’s so useful to have the additional space. You can pick them up new for decent prices, or second hand from £20-50. It’s worth it for how much food you can keep and prevent so much food waste as a household.
Key Facts:
- Yield: 12 slices of 70/30 bread
- Total Time: 2 hours 50 mins (Prep: 15 mins, Prove: 2 hours, Cook: 35 mins)
- Difficulty: Medium (Easy once you get the hang of it)
- Suitability: Vegetarian, Vegan, Dairy-Free (for gluten free, use gluten free flours available from most supermarkets)
Equipment:
- Large Bowl/Pan
- Scales
- Jug
- Tablespoon
- Teaspoon
- Loaf Tin (for 500g loaf – mine is 8.5” x 4.5”)
- Something to cover loaf while proving – a towel or muslin cloth or wooden cutting board (my go to)
- Oven Gloves
- Bread Knife
- (Optional but recommend) Food Mixer with a Dough Applicator – a reasonable £60 ish one will do, like this Salter one with great reviews.
Ingredients (£1.08 per loaf, cost 9p per slice)
- *300ml Water
- 2.5 Teaspoons (12g) Dried Active Yeast – 18p (I use Allinson’s Easy Bake Yeast in a metal container, (£1.55 for 100g from Sainsburys)
- 350g Organic White Strong Bread Flour – 63p (£1.80 for 1kg for SO Sainsbury’s Organic from Sainsbury’s)
- 150g Organic Wholewheat Spelt Flour – 27p (£1.80 for 1kg Doves Farm Spelt Wholemeal from Sainsburys)
- *Optional: 2 Tablespoons (15ml) Organic Vegetable Oil – I find this helps to combine the dough better and give it a distinct taste, but it can be omitted and it not essential (£7 for 500ml from Sainsburys)
- *Optional: 1 level teaspoon grounded Sea Salt
- *Optional: Add your favourite Mixed Seeds – for example, milled chia seeds, milled flaxseed, poppy seeds, sunflower seeds, pumpkin seeds, or maybe even some rolled oats. I would recommend adding up to 5 tablespoons of your choice of seeds. Add a variety to achieve an interesting loaf full of flavour and added fibre. I have in the past added organic milled chia seeds and flaxseeds (1 tablespoon of each) at the dry ingredients stage for added protein and for a little crunch to the loaf.
*Not included in the per person or per serving cost calculation. This is as the cost is very low (pennies) or negligible. Also most people will already have these ingredients readily available in their kitchens.
Method:
- Add 300ml of Water to a jug.
- Add the Active Dried Yeast to a mixing bowl with weighing scales underneath.
- Zero the weighing scales and add the White and Spelt Wholemeal Flours. (Optional) Add sea salt and mixed seeds if using. Mix well until consistent in appearance.
- Make a well in the middle and add the water.
- Mix in a food processor on low speed (best result) or with a large spoon initially before greasing your hand with olive oil then kneading by hand. Make the dough into a circle in the mixing bowl. (Optional) Add a tiny bit of olive oil on top to prevent it sticking to the bowl when rising. Add a baking sheet on top and then cover with a towel/wooden cutting board.
- Leave for about 1 hour until doubled in size.
- Repeat step 5.
- After an hour, preheat the oven to 200C. Roll into a ball and spread into an olive oil greased tin (optional, just makes it easier to remove when cooked). Press the dough into the tin until it’s completely flat and spread across all inches of the tin.
- When preheated, add to the oven and bake for exactly 35 minutes (if new, check after 25 minutes and 5 minutes thereafter). Tip: Take out of the oven and knock it like it’s a front door. If it sounds hollow but its hard when you knock it, and looks slightly browned, its ready.
- Leave it to fully cool down before cutting into approx 12 slices. Tip: If you cut it before hand, the slices will become dehydrated and crispy.
- Once cut, devour the side offcuts as a treat for making such a lovely homemade bread.
- Enjoy on its own, with butter on, or in a sandwich. I also like to dip into extra virgin olive oil, ever since I was introduced to it as an appetiser in Amsterdam in the Amsterdam Zoo Restaurant. In the air, use both hands to make the dough into roughly a shape that fits your loaf tin (mine is a rectangle).
- Freeze the slices to use at a later date. I could tell you to eat it within a month, but I guarantee you would have eaten it within a week, if not a few days (if you’re like me). You can defrost them within 30-50 seconds in the microwave or on the kitchen surface for about an hour before you plan on using it.
Tip: Once you are confident, you can be savvy like me and made twice as much of the ingredients and then half the mixture into 2 dough balls into 2 bread tins to save on time and effort (you’ll need a decent sized mixing bowl or food mixer bowl).
I am really proud of this recipe, so I hope this works for you. I have even had it tested by my Nan, with positive feedback. Have you tried this recipe or tried to make your own bread before? I would love to hear your experiences in the comments below.
You are the best thing since sliced bread..